
Importance of a Clean Pet Feeder for Your Pet’s Health
Your pet’s feeder is in constant contact with food, saliva, and sometimes water—making it a prime spot for bacteria, mold, and even insect infestations if not cleaned regularly. Leftover food residue can quickly spoil, especially in warm or humid environments, putting your pet at risk of gastrointestinal problems like vomiting, diarrhea, or infections. A clean feeder helps protect your pet’s immune system, ensures fresh food with every meal, and even discourages pests like ants or flies from invading their space.
Benefits of Low-Effort Cleaning Routines
Many pet owners skip regular cleaning because it feels like one more chore. But the truth is, it doesn’t have to be time-consuming. With simple routines—like rinsing the bowl daily, wiping down the feeder tray, or using dishwasher-safe parts—you can prevent buildup and odor without adding stress to your day. These “low-effort” routines save time in the long run by preventing bigger messes or costly replacements caused by mold or rust.
What “No-Fuss Cleaning” Means
“No-fuss cleaning” means quick, manageable actions that keep your pet feeder fresh and functional without requiring deep scrubbing every time. It’s about being consistent with small tasks, using the right tools and safe cleaning products, and staying ahead of problems before they start. Whether you’re a busy parent, professional, or someone caring for multiple pets, no-fuss cleaning is designed to make pet care easier—without compromising on hygiene.
In the rest of this article, we’ll walk you through tips, schedules, and simple techniques to keep your pet’s feeder spotless with minimal effort—so your pet stays happy, healthy, and well-fed every day.
Why Clean Your Pet Feeder Regularly?
Preventing Bacteria and Mold Buildup
Over time, leftover food particles and moisture in your pet’s feeder can create the perfect environment for harmful bacteria and mold. These microorganisms aren’t just unpleasant—they can seriously affect your pet’s health, leading to infections, upset stomach, and even long-term digestive issues. Regular cleaning removes residue before it has a chance to grow and spread, keeping the feeder safe and sanitary.
Keeping Food Fresh and Safe
A clean feeder helps preserve the quality of your pet’s food. Dry kibble can become stale or rancid if exposed to old residue or oily buildup, while wet food can quickly spoil if placed in an unwashed bowl. Clean surfaces ensure that your pet’s meals remain fresh, tasty, and free from contaminants, encouraging healthy eating habits and preventing illness.
Avoiding Odors and Attracting Pests
A dirty feeder doesn’t just affect your pet—it can create an unpleasant environment in your home. Spoiled food and grime can produce strong odors that linger around your pet’s feeding area. Worse, the scent of old food can attract ants, flies, cockroaches, or even rodents. By regularly cleaning the feeder, you keep your home smelling clean and free of unwanted visitors.
In short, routine cleaning of your pet’s feeder isn’t just about aesthetics—it’s a simple, effective way to protect your pet’s health, maintain food safety, and promote a clean, pest-free living space.
Choosing an Easy-to-Clean Pet Feeder
Choosing the right feeder can make all the difference when it comes to keeping your pet’s eating area clean with minimal effort. Some feeders are designed with hygiene in mind, using materials and features that make cleaning faster, easier, and more effective.
Materials That Resist Grime (Stainless Steel, BPA-Free Plastic)
The material of your pet feeder plays a big role in how easily it can be kept clean. Stainless steel is one of the best options—it resists bacteria, doesn’t absorb odors, and wipes clean with ease. BPA-free plastic is another popular choice for its lightweight feel and safety, though it may stain or scratch over time if not maintained properly. Avoid low-quality plastic that can trap oils, food particles, or bacteria in tiny scratches.
Dishwasher-Safe vs. Hand-Wash Models
If convenience is key, look for feeders labeled “dishwasher-safe.” These models are designed to withstand heat and detergents, allowing for a deeper clean with no extra work on your part. Hand-wash-only feeders can still be easy to maintain if they have smooth surfaces and few hard-to-reach areas—but they require more time and attention. Consider your cleaning habits and routine before choosing between the two.
Design Features That Simplify Cleaning
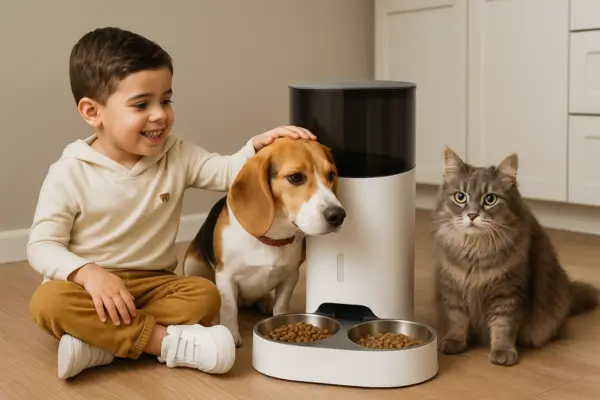
Smart design can save you time and frustration. Feeders with removable parts—such as detachable bowls, trays, or lids—are much easier to clean thoroughly. Look for smooth interiors without too many ridges, crevices, or seams where grime can hide. Some advanced feeders even include non-slip bases, water-resistant electronics, and alert systems to notify you when cleaning is needed.
Ultimately, selecting an easy-to-clean pet feeder is an investment in your pet’s health and your own convenience. With the right combination of material, structure, and features, you’ll spend less time scrubbing—and more time enjoying your pet’s company.
No-Fuss Daily Maintenance Tips
Caring for your pet’s feeder doesn’t have to be complicated or time-consuming. In fact, just a few simple steps done consistently each day can go a long way in maintaining a clean, healthy feeding environment for your furry friend. These low-effort habits help prevent buildup, reduce bacteria, and ensure your pet always has access to fresh, uncontaminated food.
Quick Rinse Routine
Right after your pet finishes eating, give their feeder bowl or tray a quick rinse with warm water. This step is especially important if your pet eats wet food, as residue can dry and become harder to remove over time. Even with dry kibble, small particles and oils can linger, creating an inviting surface for bacteria to grow.
If your feeder has removable parts, take them out and rinse them under the tap—no soap needed unless there’s visible grime. For an even easier routine, consider feeders that are dishwasher-safe and run a cycle once a day or every other day.
A quick rinse not only maintains cleanliness but also helps extend the life of the feeder by preventing food from hardening or causing stains.
Wiping Down Surfaces After Each Meal
Even the cleanest eaters leave behind some crumbs or splashes. After rinsing the bowl or feeding tray, take a moment to wipe down the outer surfaces of the feeder—especially around buttons, lids, or corners where crumbs tend to gather.
Use a damp cloth or a pet-safe antibacterial wipe to clean the feeder body, the surface it sits on, and any surrounding areas that may have been exposed to food or saliva. Avoid using harsh chemicals, as pets are sensitive to lingering residues. Opt for mild soap, vinegar-water mixtures, or wipes labeled safe for pets.
This simple wipe-down keeps bacteria, insects, and odors at bay while giving your home a cleaner look and feel.
Keeping Feeding Areas Dry
Moisture is one of the biggest enemies of pet feeder hygiene. Whether from water splashes, condensation, or leftover food residue, damp spots can quickly lead to mold, mildew, or pest problems if not addressed right away.
After cleaning, thoroughly dry all parts of the feeder with a clean towel. Allowing bowls or trays to air dry is also effective—just be sure everything is completely dry before reassembly.
To protect your floors and simplify daily cleanups, consider placing a washable silicone or rubber mat under the feeder. These mats catch spills, prevent water damage, and can be easily wiped down or rinsed in the sink.
Additionally, always check nearby water bowls to ensure they’re not overflowing or leaking—keeping the whole feeding station dry is key to long-term cleanliness.
Weekly Deep-Cleaning in Minutes
While daily maintenance keeps your pet’s feeder fresh and functional, a weekly deep-clean is essential for removing hidden grime, bacteria, and food residue that quick rinses might miss. Thankfully, this doesn’t need to take more than 10–15 minutes. With the right routine and safe cleaning products, you can ensure your pet’s feeder stays spotless, sanitary, and safe.
Step-by-Step: Soak, Scrub, Sanitize
- Disassemble the Feeder
Unplug the feeder if it’s automatic and remove all detachable parts such as bowls, trays, lids, and food compartments.
- Soak Components
Fill your sink or a basin with warm, soapy water and soak all removable parts for 10–15 minutes. This helps loosen stuck-on food and grease.
- Scrub Thoroughly
Use a soft-bristle brush or sponge to scrub each part—especially corners, seams, and crevices where residue tends to hide. Avoid using steel wool or abrasive tools that could damage surfaces.
- Sanitize
After scrubbing, rinse each part with clean water and sanitize using a pet-safe disinfectant or a natural solution like diluted vinegar (1 part vinegar to 3 parts water). Let sit for a few minutes, then rinse again thoroughly.
Use of Safe, Pet-Friendly Cleaning Products
Not all cleaning products are safe for pets. Avoid strong chemicals like bleach or ammonia, which can leave behind toxic residues. Instead, choose:
- Mild dish soaps labeled as non-toxic
- DIY solutions like white vinegar and baking soda
- Commercial pet-safe cleaning sprays (look for “pet-safe” or “natural” labels)
Always rinse thoroughly after using any cleaner to remove all traces of residue.
Drying and Reassembling Properly
Once cleaned and rinsed:
- Dry each part completely with a clean towel or let them air dry on a drying rack. Moisture can lead to mold or damage electronics if reassembled too soon.
- Inspect parts for cracks, mildew spots, or wear-and-tear that may signal it’s time for a replacement.
- Reassemble the feeder carefully, making sure all parts are secured properly before refilling with food or plugging it back in.
Avoiding Common Cleaning Mistakes
Even with the best intentions, it’s easy to overlook key details when cleaning your pet’s feeder. Unfortunately, small mistakes can have big consequences for your pet’s health and the lifespan of your feeder. By being aware of these common pitfalls, you can avoid setbacks and keep your pet’s feeding station truly clean and safe.
Using Harsh Chemicals
One of the most common mistakes is using strong, chemical-based cleaners like bleach, ammonia, or multi-surface sprays not intended for pet use. These products may leave behind harmful residues that can transfer to your pet’s food and lead to serious health issues over time. Always stick to mild dish soap, vinegar-based solutions, or products clearly labeled as pet-safe. When in doubt, rinse thoroughly—even with natural cleaners—to ensure no traces are left behind.
Forgetting Hidden Crevices or Moving Parts
Pet feeders often have seams, small compartments, gears, and hidden corners where food particles and moisture can accumulate. These spots are easy to miss during a quick wipe-down, allowing mold or bacteria to grow unnoticed. Take time during your weekly cleaning to disassemble the feeder as much as possible. Use small brushes (like a toothbrush) to get into tight areas and don’t ignore under the bowl, under lids, or inside dispensing chutes.
Infrequent Cleaning Schedules
Cleaning only “when it looks dirty” can be a costly mistake. By the time grime or odor is visible, bacteria and mold may already be affecting your pet’s food. Infrequent cleaning also increases the chances of attracting pests like ants, flies, or rodents. Stick to a consistent routine:
- Daily: Quick rinse and surface wipe
- Weekly: Full disassembly and deep-clean
Set reminders if needed—your pet’s health is worth the few minutes it takes to stay on schedule.
Bonus Tips for Smart & Automatic Feeders
Smart and automatic pet feeders make life easier by automating feeding times, controlling portions, and even allowing remote access via apps. However, these high-tech devices also come with special maintenance needs. To keep your automatic feeder running smoothly and safely, it’s important to give extra attention to its electronics and follow the manufacturer’s care instructions.
Cleaning Sensors, Screens, and Battery Compartments
Modern feeders often include sensors that detect food levels or monitor feeding habits, as well as digital screens or buttons for programming. These parts can collect dust, food particles, or grease that may affect their function over time.
- Sensors: Gently wipe with a soft, dry cloth or lightly damp microfiber cloth. Avoid direct contact with water or cleaning sprays.
- Touchscreens or Buttons: Use pet-safe electronic wipes or a barely damp cloth to clean smudges and fingerprints. Do not press too hard or use abrasive materials.
- Battery Compartments: If your feeder runs on batteries, remove them occasionally to check for leaks or corrosion. Clean the terminals with a dry brush and make sure the area is moisture-free before replacing batteries.
Keeping these components clean ensures accurate dispensing and avoids system errors.
Manufacturer-Recommended Cleaning Methods
Not all automatic feeders are built the same. Some allow you to remove internal parts for washing, while others require spot-cleaning only. Always check the user manual for specific cleaning guidelines, especially regarding:
- Which parts are dishwasher-safe
- What not to submerge in water
- Approved cleaning products
- How often maintenance is suggested
Following the manufacturer’s instructions will help you avoid voiding the warranty and prevent damage to electronic components.
When to Reset or Update the Feeder System
If your smart feeder connects to an app or Wi-Fi, regular software updates can improve functionality and fix bugs. Be sure to:
- Check the app or website for firmware updates
- Reset the feeder if it starts malfunctioning or displaying errors
- Recalibrate food portion settings as needed after cleaning or restocking
A clean feeder combined with a properly updated system ensures your pet gets the right amount of food on time, every time.
Conclusion
Maintaining a clean pet feeder may seem like just one more task on your to-do list, but the truth is—it’s one of the simplest ways to support your pet’s long-term health and happiness. And the best part? It doesn’t take much effort. With just a few minutes a day and a slightly deeper clean once a week, you can keep your pet’s feeding station spotless and sanitary without the stress of complicated routines.
How Easy It Is to Keep Feeders Spotless with Minimal Effort
From quick daily rinses and wipe-downs to weekly soaks and sanitizing, the process of keeping your feeder clean is surprisingly simple. Choosing the right materials—like stainless steel or BPA-free plastic—and feeders with smart, easy-to-clean designs makes all the difference. And for automatic or smart feeders, even cleaning sensors and electronics can be done in just a few careful steps.
The takeaway? You don’t need to spend hours scrubbing or buy expensive tools to keep your pet’s mealtime area in top shape. No-fuss cleaning is all about small, consistent habits that work with your lifestyle.
Encouragement to Adopt a Regular No-Fuss Cleaning Habit
Think of your cleaning routine not as a chore, but as a daily act of care. Your pet depends on you for a safe, clean space to eat—just as you’d expect clean dishes at your own table. By committing to a no-fuss cleaning habit, you’re actively preventing illness, improving your pet’s eating experience, and extending the life of your feeder.
It only takes a few days of consistent effort to make these cleaning steps feel automatic. Once they’re part of your rhythm, you’ll wonder how you ever managed without them.
Set Reminders to Stay Consistent
Life gets busy, and it’s easy to forget even the smallest tasks—so let technology help. Set simple reminders on your phone or calendar for daily quick-cleaning and weekly deep-cleaning. You can also place a sticky note near the feeder or use a dry-erase board in your pet care station to track your cleaning schedule.
Staying consistent is the key to long-term success. And remember—clean feeder, happy pet. Your furry friend will thank you with every healthy, tail-wagging mealtime.
By embracing these easy, no-fuss cleaning habits, you’re not just protecting your pet—you’re making life simpler and more joyful for both of you.